Testing your code with unit tests
Debugging and testing is very important when coding. Your IDE helps you a great deal by providing a debugger.
In addition, you should write test classes with so called unit tests: each unit test tests one aspect of your code. For example it runs your program with all default inputs and checks that the output is correct. Or it checks the behaviour of your CLI when the user inputs an invalid file. Or it checks that a specific button does what it is supposed to. Or …
The point of writing these unit tests, is that you can run them quickly and frequently to check that your program is still doing what it is supposed to and does not break, even after you make some edits.
First you need test classes and test data. A class looks something like this:
import os.path as path
import unittest

from qgisplugin.core.my_code import MyCode
from qgisplugin.interfaces import import_image

DATA_FOLDER = path.join(path.dirname(__file__), "data")

class TestCore(unittest.TestCase):

    def test_core(self):
        # input
        image, _ = import_image(path.join(DATA_FOLDER, 'image.tif'))

        # run code
        result = MyCode(image=image, normalize=True, quotient=255).execute(constant=0.01, threshold=0.2)

        # evaluate
        self.assertEqual(len(result), len(image))
        # todo it makes more sense to compare the actual content of the array, we leave this up to you
Next, you need a quick way to run your test classes. You have a few options.
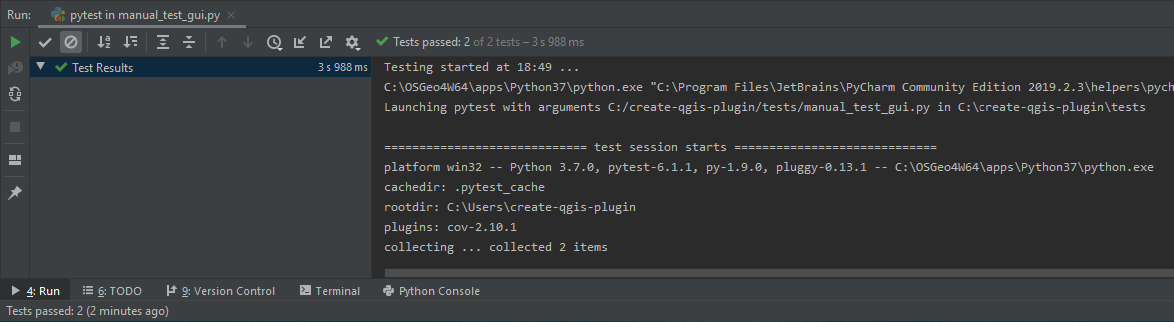
You can run each class manually, if you only have a few: just right-click on each script and then click Run. You will get a summary on the console looking like this:
You can run all test classes at the same time with PyTest. Run the following line of code in the terminal:
python -m pytest --cov qgisplugin.core --cov qgisplugin.interfaces --cov-report term-missing tests
This command orders pytest to check all python scripts in the folder tests whose name begin with test_ and run the unit tests within them. Alongside the failure or success rate of each test class, you get some statistics on the coverage of all scripts that are in the folders qgisplugin.core and qgisplugin.interfaces (see parameter –cov). This coverage tells us what % of the code is covered by the test classes. The parameter term-missing then adds more information: the lines of code that have not been tested by our test classes. It is difficult to reach 100 % coverage, however this helps you detect vulnerabilities in your test regime.
=========================== test session starts =============================
platform win32 -- Python 3.7.0, pytest-6.1.1, py-1.9.0, pluggy-0.13.1
rootdir: C:\create-qgis-plugin
plugins: cov-2.10.1
collected 5 items

tests\test_cli.py ..               [ 40%]
tests\test_core.py .               [ 60%]
tests\test_gui.py ..               [100%]

----------- coverage: platform win32, python 3.7.0-final-0 ------------------
Name                                            Stmts   Miss  Cover   Missing
-----------------------------------------------------------------------------
qgisplugin\core\__init__.py                         0      0   100%
qgisplugin\core\my_code.py                         26      0   100%
qgisplugin\interfaces\__init__.py                  32      8    75%   35, 45-46, 55-60
qgisplugin\interfaces\my_cli.py                    33      3    91%   73-74, 78
qgisplugin\interfaces\my_gui.py                   117     36    69%   94-108, 122-133, 145, 165,
                                                                      172-178, 200-207, 211
qgisplugin\interfaces\my_plugin_processing.py      49     49     0%   2-148
qgisplugin\interfaces\my_plugin_provider.py        13     13     0%   2-44
-----------------------------------------------------------------------------
TOTAL                                             270    109    60%

=========================== 5 passed, 15 warnings in 6.18s ====================
You can also have these test run automatically by your versioning system. For example Bitbucket has a continuous development implementation named pipelines.
In order to make use of this option, you need the bitbucket-pipelines.yml yaml file. With the following implementation the test suite is run with each commit to the repository:
image: qgis/qgis

definitions:
  steps:
    - step: &Test-step
        script:
          - python -m pip install -r requirements.txt
          - python -m pip install -r requirements-dev.txt
          - python setup.py develop
          - apt-get update
          - apt-get install -y xvfb
          - apt-get install -y wget
          - apt-get install -y unzip
          - Xvfb :1 -screen 0 1024x768x16 &> xvfb.log  &
          - ps aux | grep X
          - DISPLAY=:1.0
          - export DISPLAY
          - python create_resourcefiles.py
          - python -m pytest --cov qgisplugin.core --cov qgisplugin.interface --cov-report term-missing tests

pipelines:
  branches:
    default:
      - step: *Test-step
    staging:
      - step: *PYPI-step
Note
The bitbucket pipeline mechanism seems to have trouble with testing the GUI, as it uses a timer to open and close widgets. Therefore we have taken it out of the equation by prefixing the script with manual_. This test will therefore not be part of any automated testing, but you can run it manually now and then to check that your GUI is still functioning properly.
Before you upload your code to an online platform, make sure you follow the steps here in order not to have incorrect licensing information or author identification.